21 December 2011

Making a sweater stocking

It was time for new stockings! The ones we've been using don't match, plus one of them is red and green and I'm not so big on decorating for Christmas with those predictable colors. :)

So, you know me, there's no way I'm going to the store to buy new stockings. Not when I can make them for super cheap! Here's the lowdown:

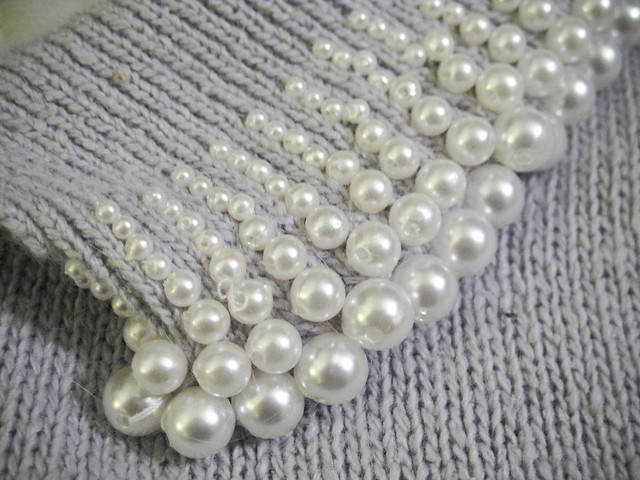
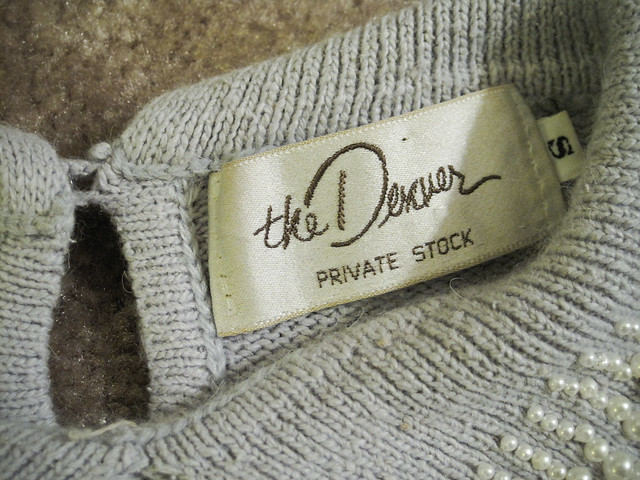
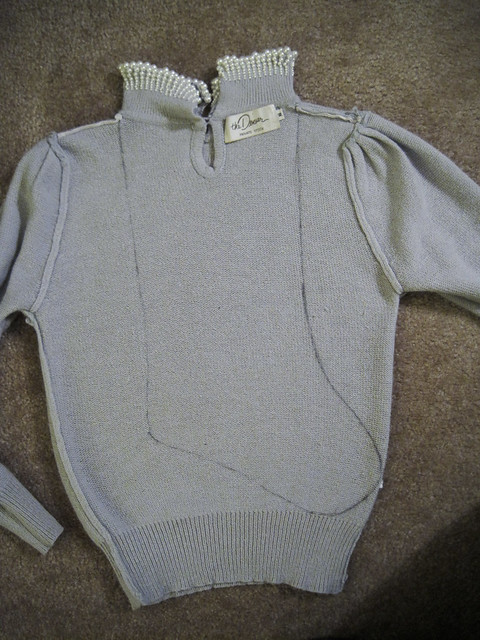
I found this vintage sweater at the thrift store with this amazing pearl collar. It even has a label that says "The Denver" (where we live). I've never made a stocking before, but I have made pillows out of sweaters before, so how hard could it be?


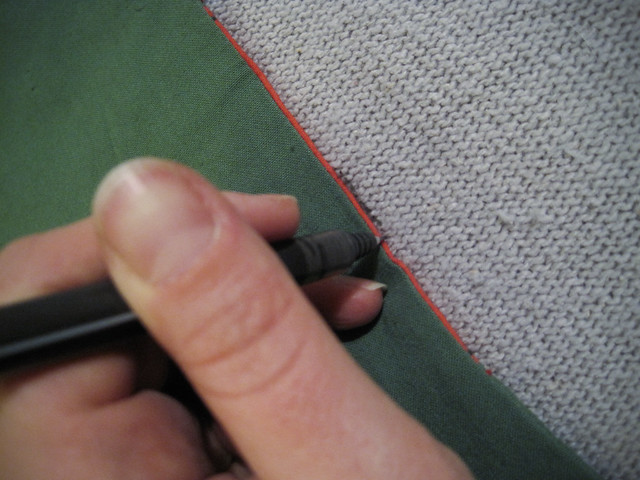
I traced the outline of one of our old stockings onto the sweater turned inside out, making sure to position it so that the collar is at the top.


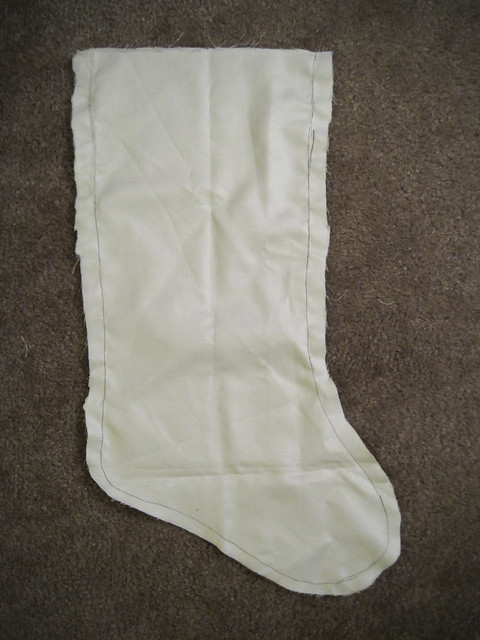
I also made a liner out of some scrap material, again using the old stocking as a guide.

I had to cut off a bit of the top of the liner so it wouldn't show on the finished product. I didn't really know what I was doing with this liner, so it looks a little funky. I pinned it onto the sweater, both inside out, and just sewed around the outline.


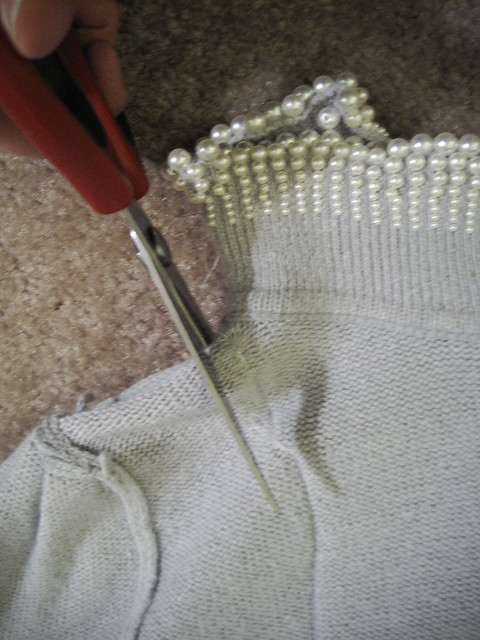
The first cut of the sweater:


Almost done:


Done!


Finishing touches: I cut some of the finished seam off of the extra sweater pieces to make a loop. Just hand sewed that on. Then I turned the stocking right side out and hung it on the mantel. Success! I love how the label is part of the design!


The next day I made on for my man out of a more man-ish sweater. It's still a woman's sweater, but has a nice chunky cable knit and no beads. :) I used the same technique but didn't put in a liner and I used the waist band of the sweater as the top of the stocking.

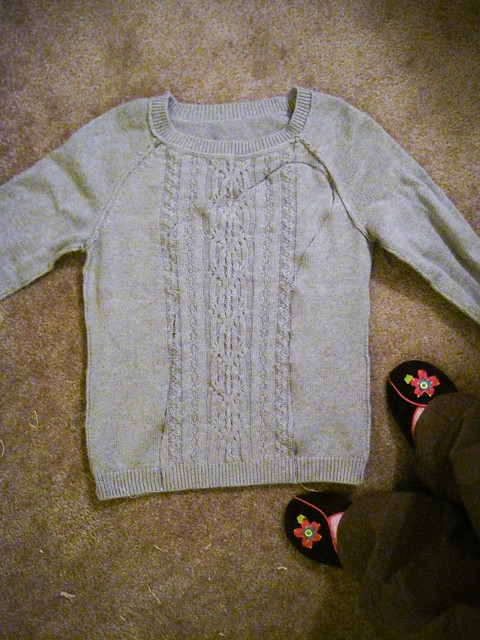
Looks like I need to vacuum up those fabric scraps!!
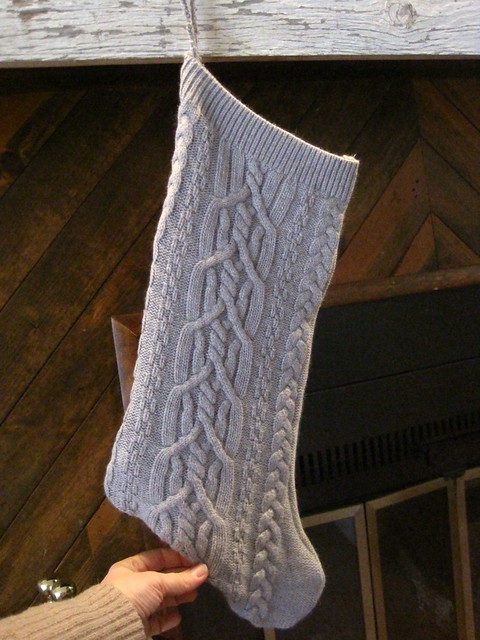
Pay no attention to my hand. I couldn't get the stocking to hang the right way for the photo.
Now we both have stockings that fit our style and our home's decor. If I decide so in the future, I can add decorative doo-da's, but for now, I'm happy. Now let's fill them with stuff!

16 December 2011

The great rental mantel slip cover

There are certain pros and cons to living in a rental. No yard work. That's a pro. Someone else pays for stuff to get fixed. Another pro. Dated 80's architecture. That is most definitely a con. Case in point, this lovely fireplace:


Now don't get me wrong - we love having a fireplace. A wood burning one, too. It's the placement (right by the front door), the tile (mottled brown & black), the diagonal wood surround, and that miniscule little rounded corner excuse for a mantel. Even our key bowl hangs over the edge a bit.


So I got an idea in my head that my dad could build a slip cover for this thing that could be removed when we leave. You know how much I love the idea of a slipcover!

I emailed my dad a picture of the mantel then a photoshopped version of what I wanted. He likes a good problem to solve. He was a math teacher. :)


He had some barn wood laying around so he brought it with him when he and my mom came to bring a bunch of our stuff from storage (THANK YOU!!!).

I should have taken during shots, but I didn't. My mom and I went thrifting. Anywhoo, the barn wood he brought was WAY better than I had expected. He let me choose between the weathered grey side or the weathered white painted side. WHITE PAINT. It is a super nice contrast with the stained wood surround. And here's the finished product:


Isn't that SO much better? And it's removable! Now I can experiment with styling the thing. It's deeper, so more stuff fits on. He made it thick enough so that it just hits the top of the light switch by the door.


I LOVE the weathered paint. This is the real stuff, no faux here.


Before:


And after:


Much better! Oh, and pay no attention to the crap stuff reflected in the mirror. I'm still working on that area. And I plan to paint the mirror frame the same color I painted the bathroom vanity in our Nebraska house.

More on that pearl embellished sweater stocking to come...

Today I'm participating in this excellent party:


Furniture Feature Fridays