28 February 2009

Sharpie Art & A Quiet Rainy Saturday


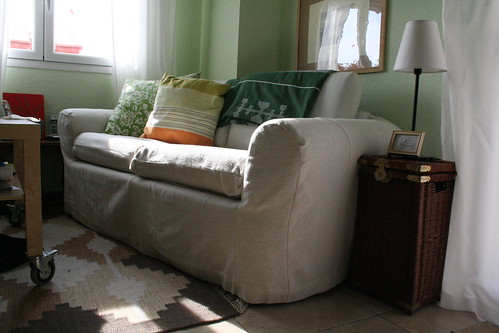
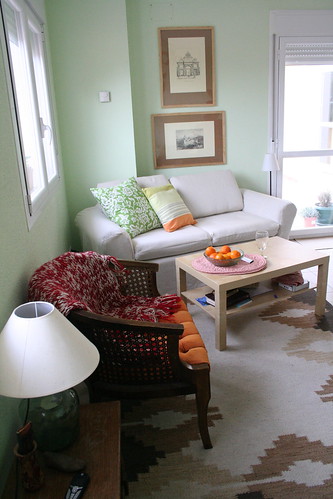
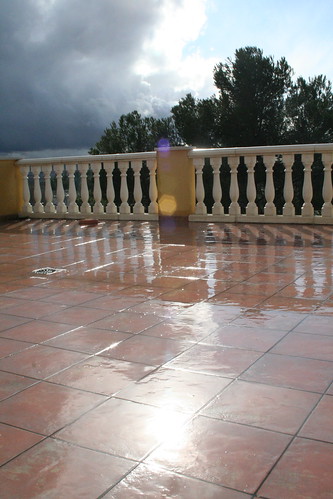
It's a quiet day. The last several days have been sunny & warm, but today is overcast & chilly. There's even a light rain coming down.


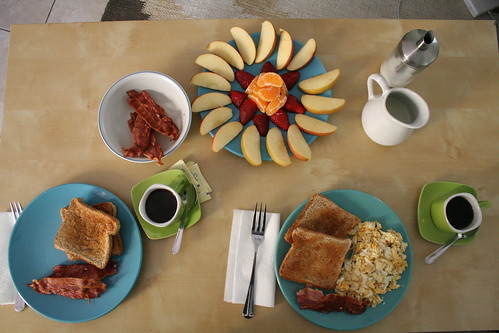
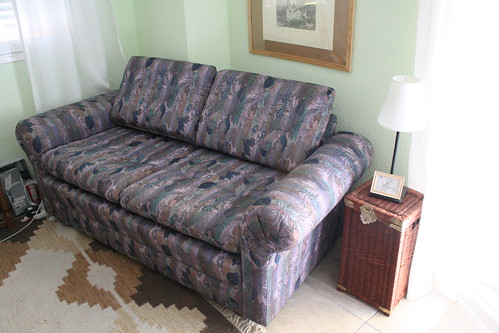
It's a good day to stay in & enjoy the peace. Vino fell asleep on the love seat, and there are no sounds except the quiet piano music of Linford Detweiler. It's our favorite relaxing music. I've just been dinking around the kitchen today, making coffee, washing produce.
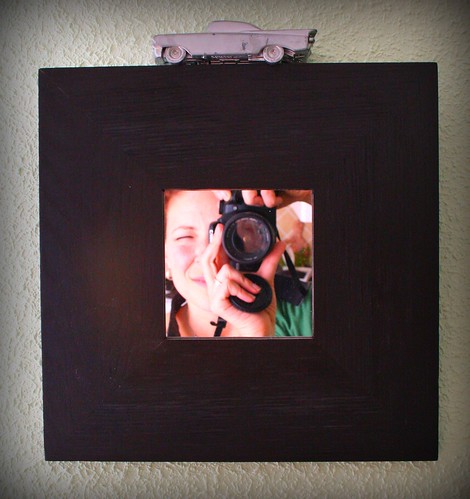

Taking photos.


Speaking of taking photos, I finally got around to taking some of a project I did almost a year ago. So easy, so cheap! Not as cheap as free, but they can't all be. In the building where we live, there is a commons area just outside our apartment door. We needed some art for the dining area, so I purchased a blank pre-stretched canvas and some tan-ish colored paint. I painted the entire canvas tan & let it dry (which took a long time because it was oil paint, which I don't like very much because it's stinky, inconvenient to clean up...and takes a long time to dry). Next I planned out something to draw on the canvas. I got the idea for the flower style from this image:


I found it online somewhere, but don't rememer where. Anyways, I did a mock-up in Photoshop of how I wanted the flowers to look on the canvas, then printed it out on regular letter size paper. I did some scientific eye-balling to transfer the design from paper to canvas. Basically, I just looked at the paper & drew it freehand with a pencil on the canvas. By the way, pencil doesn't erase well on oil painted canvas, so it's good to get it right the first time! When I was happy with the design, I traced over the pencil with a fabulous artist's tool...the Sharpie. I think Sharpies are underrated. There are a gazillion things you can do with them! I am not ashamed to admit that I have given my hair ghetto "auburn" low-lights with a red Sharpie. It works, and it stays in. It's probably not really good for your hair, though, so I wouldn't recommend trying this at home (although I probably will do it again). Anyways, back to the artwork. Here's the finished product with close up and extreme close up so you can see that it really is a Sharpie drawing and that I didn't do it perfectly:


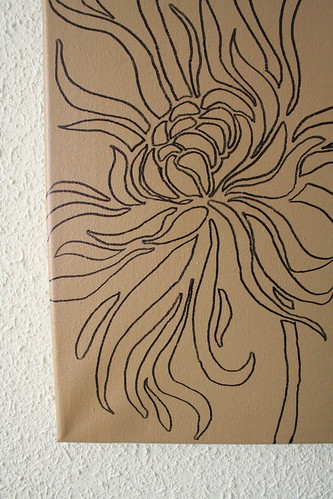
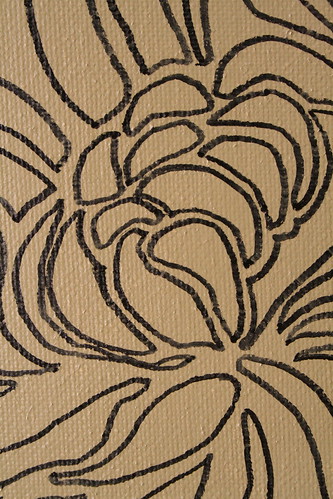
My intent was to fill it in with white paint, but I never got around to it. Lazy crafter. I'm pretty happy with the way it turned out. Especially when our friend Noelle, a Nebraska friend who visted us last year, said, "Hey, that looks like something I'd pay a lot of money for at Urban Outfitters."

AND, my day was made.

22 February 2009

Caramel Corn & Other Tasty Treats

I love me some sugar. LOVE. I'm not supposed to have a lot of it, and I'm blessed with a husband who reminds me to keep my sugar intake in check. When I get to heaven, I'll eat all the chocolate & cream filled long johns I want, and they'll be good for me. In the mean time, though, I can SPARINGLY enjoy the tasty treats that Vino comes up with. Take, for instance, his stuffed strawberries.


I'll post a recipe & more photos of those later, but let me just say that they are divine. He's all about the presentation, as you can see. Here's what he made me for breakfast this morning:


I'm a lucky girl. :)

He also makes his own cooking show, which he posts on YouTube. There are several in the works, but the most popular one (and one that he just upgraded with cool graphics) is his caramel corn.


I brag about this stuff, but it's not because I'm biased and he's cute. It's because it is seriously the best caramel corn I've ever had, hands down. We made the video in our old house, before we sold it (that's me behind the camera). Every time I watch it, I miss my little kitchen! So for your viewing pleasure, and I hope for your eating pleasure if you choose to make the recipe, here's the love of my life, looking snazzy in my Pampered Chef apron. Enjoy!

Vino's Kitchen Caramel Corn Recipe

P.S. He'd love it if you checked out his other videos. They're mostly about us here in Spain.

21 February 2009

The Slipcover that Saved my Sanity part 2

Before:


After:


So this world of blogging has recently become more fascinating to me. I still consider myself a new blogger, and I don't think a whole lot of people actually read what I write. But a couple of days ago I participated in a link party over at Nesting Place, and I've had more comments than EVER. I try not to obsess over this blog, but there's something very affirming when people I don't know say nice things to me. And it doesn't take much to visit other people's blogs and say nice things to them, either. I should do that more in real life.

Anyhoo, in this flurry of comments, I have actually received Requests. Well, one was not an actual request, but I'm going to take it that way. Rachel is interested in how I made my ghetto slip cover because she wants to make one herself for an ugly chair that she has. Go Rachel! So, I'm going to attempt a tutorial of sorts. Which I think is kind of funny since I'm not a seamstress. Here goes!
  1. Gather your materials. Piece of furniture to be recovered, fabric, scissors, LOTS of long pins, sewing machine & matching thread.
  2. Make sure you have enough fabric. Although my dad was a math teacher, I'm not that great at math, or maybe I'm just lazy. But I don't measure & calculate. What I did do was throw one of the curtains over the loveseat and do a little tucking to "rough out" an approximate slip cover. There was more than enough fabric in that one curtain to do the main body of the slip cover, and I had two curtains, so I knew I would have enough fabric to do the cushions, too. I did do some eyeball-ing to make sure I'd have enough finished hems to use so I wouldn't have to sew my own.
  3. Figure out how you want your slip cover to be constructed. I broke it down like this: One big piece for the bottom front that also covers the seat base & seat back; one big piece for the whole back, minus the arms; one piece each for the arm fronts; one piece each that covers the sides & tops of the arms; one piece each for the backs of the arms; two pieces for each of the cushions (four cushions in total, two seat & two back). For you it will totally depend on the shape of your furniture. I just tried to figure out what would be easiest to fit all together. I also made sure that the existing curtain hem would hang at the bottom all around.
  4. Cut out your first piece! I started with the biggest pieces, then worked my way down to the smallest ones. For each piece I put the fabric right side down on the area I wanted to cover and marked with a pencil where it would be sewn. Then I put the fabric on the floor & cut it out leaving about a 1 inch seam allowance all around. I wanted a large seam allowance so I could tweak the fit later. After the fabric was cut, I put it back on the love seat & pinned it to the furniture. I did the same thing with each piece, pinning the seams together where the pencil marks were, but tweaking the fit as I went. Here's a photo of the main piece with the cushions off. I hope you can see from this photo how I put the biggest piece with others next to it.
  5. Sew the pieces together. When all of the pieces were cut out & pinned, I removed the cover all in one piece & started sewing the seams together. When three pieces came together at a corner, I sewed two pieces together first, then sewed them to the third piece. I hope that makes sense in writing! When all the pieces were sewn together, I put the slip cover back on the love seat to make sure it all fit right. Once I was sure of that, I trimmed the seams so that they were relatively even all around.
  6. Construct the cushion covers. I planned these out to fit like pillow cases. I laid the fabric on the floor & traced around the cushions, making them big enough for the seams to meet. I didn't want to make box cushions. Actually, I just followed the way that the current cushion covers are made. For the openings, made sure that the hems (which were original to the curtains - did that on purpose!) would overlap enough to close. Too lazy to make button holes, I just tack these closed with thread that I cut & retack for washing.
  7. Details. On the rounded corners, I made little pleats so that the fabric fit well. On the cushion covers, this is what they look like on the corners. I just sewed them like a knife edge pillow, then turned them right side out & tucked the corners in, tacking the pinched parts together with thread. It works. Here's what they look like inside out. I don't think I can explain how I did the opening corners. I'm not quite sure myself how I did them! It was a bit of trial & error. I hope you can figure out from the photos what I did. Sorry!
Yikes, I hope I explained it all right. I won't lie, it took me a few days to do this - a couple of hours one day cutting it out, a few hours the next day sewing & fitting. The real difficulty is just dealing with all of the fabric. If any of you have made your own slip cover, send me photos or links! I'll tell you now, I'm proud of you!

19 February 2009

The Slipcover that Saved my Sanity

Today I'm participating in an event over at Nesting Place, a blog I read regularly.


The Nester has been posting great ideas for 10 minutes to the room you love. This project took more than ten minutes to make, but it would have taken less than 10 minutes if I would have purchased instead of created. Alas, I'm too cheap!


We live in Spain, temporarily. We're here for two years, with about 5 months of that two years left to go. We are blessed with a beautiful yet tiny little apartment while we're here. It's just big enough for the two of us, and not much more! Although we have supplemented here and there, most of the furniture we have came with the place, and will stay here when we leave, including the love seat pictured above. I'm not too picky, for the most part (Vino might disagree!). All I ask for in living room seating is comfort, the right size, and not ugly. Well, I can't have everything. Two out of three will have to do. This piece of furniture was most likely donated, having been very well cared for by the previous owner, who spent the money & time to have it reupholstered. She actually chose this fabric. Here's a close-up:


All it's purple, green & blue majesty just didn't fit in with my style. So what's a girl to do? We have boxes and boxes of old drapes in the attic where we live, and I had free reign to use what I found. What I did find was a pair of ridiculously wide & short, fairly ugly tan-ish drapes. They had a couple of stains here and there, but the fabric was promising. Thick enough for upholstery fabric, but thin enough for me to sew with my limited abilities. I had sewn a removable slipcover once before in my life and had vowed to never do it again. Well, I had to break my vow. I'm sure you can understand why. I proceeded to make the most simple slipcover that I could possibly make. I can't stand the slipcovers that require constant tucking, so I was glad that this love seat has removable cushions. Pretty much all I did was hold the fabric up to each section of the love seat and cut it out. I've said before on this blog that I don't like to measure. I wing it a lot. What I did plan for, though, was to use the existing hems of the curtains for the bottom hem of the slipcover. No use in reinventing the wheel. I didn't use piping, and I didn't bother to make the arms fitted. I wanted something that would hang straight and that I could pull off easily to wash. Plus, I don't do zippers. The cushion covers overlap in the back. I suppose I could have made button holes, but that would have been more work, so I just tacked them shut with a little thread that I cut & retack for washing. Enough talk. Here's the after:


Not too bad, huh? By the way, the rest of my color palette revolved around trying to make the orange chair look like I want it there, thus the orange & green pillow made from Ikea dish towels and the bowl of oranges on the table.

Do you have things in your house that aren't what you would have chosen, but they are what you have to live with? There are almost ALWAYS cheap yet satisfying things you can do to make them your own. So put away that wallet and figure out something great to do with what you have! And be sure to head over to Nesting Place to check out everyone else's 10 minute makeovers!

14 February 2009

Someone to watch over me...and bite my face.


This is the way it usually goes.


It's difficult for me to get a photo of the two of us where we're both smiling.


Sometimes I participate. Sometimes.


I've been known to photoshop two photos of us together to get one descent photo. But I wouldn't have it any other way. We have a lot of fun together.


We're two of a kind, and I can't imagine spending my life with anyone else. He makes me a better person, and I hope that more of my good qualities rub off on him than my bad. He's still my best friend. We tell each other that a lot.


And every once in a blue moon, he'll smile for the camera.


I love you, Vino! Happy Valentine's Day!

Crafty: Make a lavender sachet

Happy Valentine's Day! This is a crafty blog post that could be for Valentine's Day, I suppose. However, I made these for Christmas gifts. They could work year round, though!

I have a hard time buying Christmas gifts. It's not that I don't want to give gifts to my friends and family. On the contrary - I love giving gifts! The thing is, I would much rather MAKE the gifts. There are a couple of reasons for this. First of all, I'm Cheap, and I'm always looking for ways to save money. But secondly, and most importantly, I love to be creative and give people something that they can't go out and buy at any old store.

This past Christmas was no different. I made a few different things, but the items I spent the most time on were lavender sachets that I gave to all the women in my family, and to a lot of my women friends. Lavender is my favorite fragrance, and it is very plentiful in Spain. It makes me happy. I wanted to share something from this country that I love, with those at home, whom I also love! Silly me, didn't take photos of the process, so I'll improvise. Thanks, Mom, for the photo of the final product!


The arsenal of supplies:


Here's how I made these little heavenly smelling numbers:
  1. Gather the lavender flowers. Fortunately for me, this was easy. Lavender is EVERYWHERE in Spain. They use it for shrubs in medians, it grows wild on hillsides... I spent a few months collecting lavender wands whenever I would see them (that didn't look owned by someone else! I have some growing in pots, but it didn't do well last year. So I trolled the neighborhood and found a giant hillside with a path down the middle. On one side of the path was all rosemary and on the other side was all lavender. Score! At the end of the summer, city maintenance guys come along and cut it all down. And THROW IT AWAY! Shameful. Anyways...my friend Crystal and I cut two large tote bags full of lavender, since they were going to throw it away.
  2. Dry the flowers. I like to keep them on the wand, but cut off the leaves. They just get in the way. Keep them open to the air. I put them in a large box lid, fluffing & rotating them every once in a while. If you don't dry the flowers first, before putting them in a container, they start to get kinda moist & rotten smelling. Defeats the purpose. They'll probably mold, too.
  3. De-flower the wands. It's much easier to do this when the flowers are dry as opposed to fresh. You can just run your fingers down the wand a few time and that will get most of them. I'm kinda anal about not wasting one single flower. I'm weird like that. This was an activity that I liked to do while watching movies, since I can't sit & watch something without feeling guilty if I'm not also accomplishing something else. I stored the flowers in cleaned out bean jars, but use whatever you have.
  4. Cut the fabric. I don't measure, if I don't absolutely have to. I also don't mark. I do a lot of eyeball-ing. I used the TELKA dish towel from Ikea. They were only 39 EURO cents each, and I got 9 sachets out of each towel. Talk about thrifty! Basically, I cut the towel like this: For the long rectangular pieces, I folded them in half so that one side had a red stripe at the bottom and one side was just plain white. For the shorter rectangular pieces, I just put those together so that each side of the sachet had a stripe at the bottom.
  5. Decorate the fabric. Do this before sewing, in case you mess one up, then you haven't wasted the time of sewing. I used a bird stamp and a red stamp pad for the image. The bird had nothing to do with lavender, but I liked the image, and no one seemed to be bothered by it. :) I have this set that my mom bought for me. I love it! Cavallini has some beautiful stamps. I also used a red sharpie to write "Spanish Lavender" above the stamp. I tested the fabric first to make sure it wouldn't bleed.
  6. Sew the pieces together. I used a sewing machine I borrowed from a friend, but these could be done by hand. Put the pieces right sides facing each other & sew the edges together, leaving about an inch and a half open on the end. Clip the corners and turn right-side out.
  7. Fill with lavender flowers. I made a little funnel with a piece of paper because I didn't have a funnel on hand, but it would be easier to use a real funnel. Spoon in the lavender and fill the bag mostly to the top, packing it down a little as you go. Leave enough room at the top to be able to sew it closed.
  8. Hand-sew it closed. Self explanatory, I hope.


These are great to put in with your sweaters, under-things, etc. I had a headache the other day and fell asleep with one of the sachets on my pillow in front of my nose. Mmmmm. I made about 40 of these things and they cost me hardly anything. They were quite time consuming for that quantity, but it was worth it. And I never once got tire of smelling lavender in my house. Happy smells. :)

08 February 2009

baby Cora

Cora passed away. You can read her story here.

06 February 2009

{ sniff, sniff...grrrrr }

I Intensely Dislike jacked up hormones.

Things that make me happy

It's snowing again, which is REALLY odd for Madrid. It doesn't look like any is accumulating, though. It's cold (about 36 F - cold for here, heat wave at home for a Nebraska winter!) and gloomy out. We've had a lot of rain lately, and I get happy feelings inside when the sun peeks out on those days. It's a reminder that the dreary days will not be here forever.


Today, Friday, is produce market day. A few vendors come to our tiny little town and set up stalls where they sell the most colorful produce. I'll take my camera some day, but not today. Because it's snowing. And overcast. Vino likes to get grapefruit there because he likes eating them. I like to get grapefruit (pomelo) because of how the the colors look when they are sliced in half on our turquoise colored plates. Silly, maybe, but it makes me happy.


Today I will go to the market and buy more mandarins for Vino, as requested, who is STILL confined to the couch, recouperating. We have another doctor's appointment next week. Poor guy.

Yesterday I turned 37, and he felt bad that he couldn't do much to celebrate. But he made me this, and it made me happy:


That's him on the balloon. I love Butterfingers, and we can't get them here. This one is from his dwindling "stash" in the cupboard. It really didn't bother me that we didn't do anything elaborate. It's not like he can get out and go shopping for me. I like homemade stuff, anyways. It always means more, no matter how humble. :) We ordered Chinese food and rented "The Secret Life of Bees" on iTunes, and had a nice evening at home. Maybe later we'll go out and celebrate. When it's sunny and warmer. That would make me happy.

05 February 2009

pray for baby Cora


This is Cora, and she has cancer. You can learn more about her at themcclenahans.blogspot.com


I took this photo from Meg Duerksen's blog whatever, and added the reminder to pray. I printed it out and put it in a place I will see every day. If you want to do the same, here it is 4x6. Please pray for this little one who needs a miracle!